04. Build your Campaign Option 1
Get Started: Udacity Sandbox Projects
Project Intro ANIMATED V3sharp
Note - You will receive $100.00 credit to create and run your Campaign in the designated time-window, as opposed to $125.00 shown in the video demonstration.
Stage I. Ads Manager
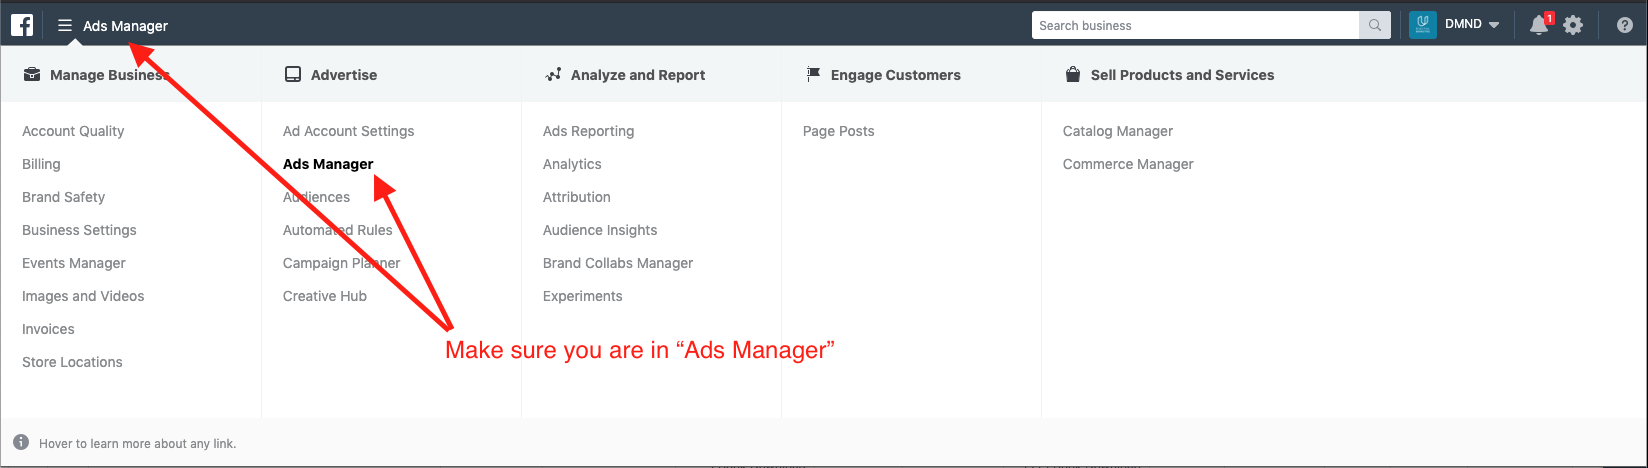
- Confirm you are on the DMND Facebook Ads Manager page. Click on nav in the extreme top-left hand of the screen and select “Ad Manager” as shown in the snapshot below.
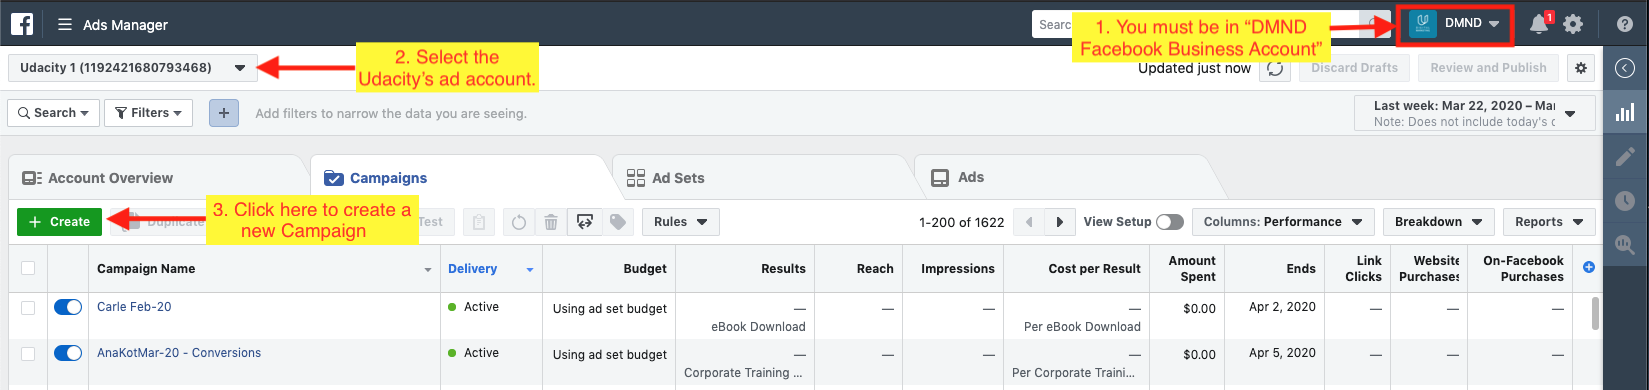
- In the Ads Manager dashboard, click on the top-left drop-down and select the ad account that should include 'Udacity'.
- From the Ads Manager dashboard, you’ll want to click on the green Create button.
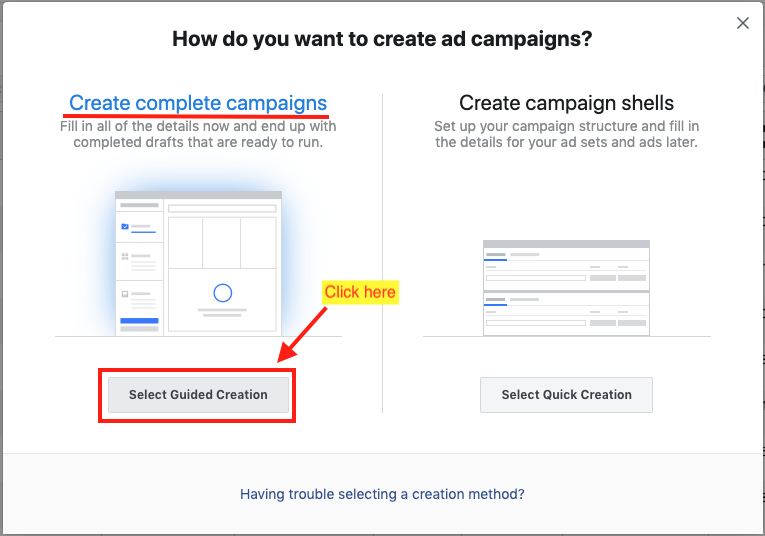
- You will be prompted with two choices - create a complete campaign OR create campaign shells. Click on the Select Guided Creation button to create a complete campaign.
Stage II. Create a New Campaign
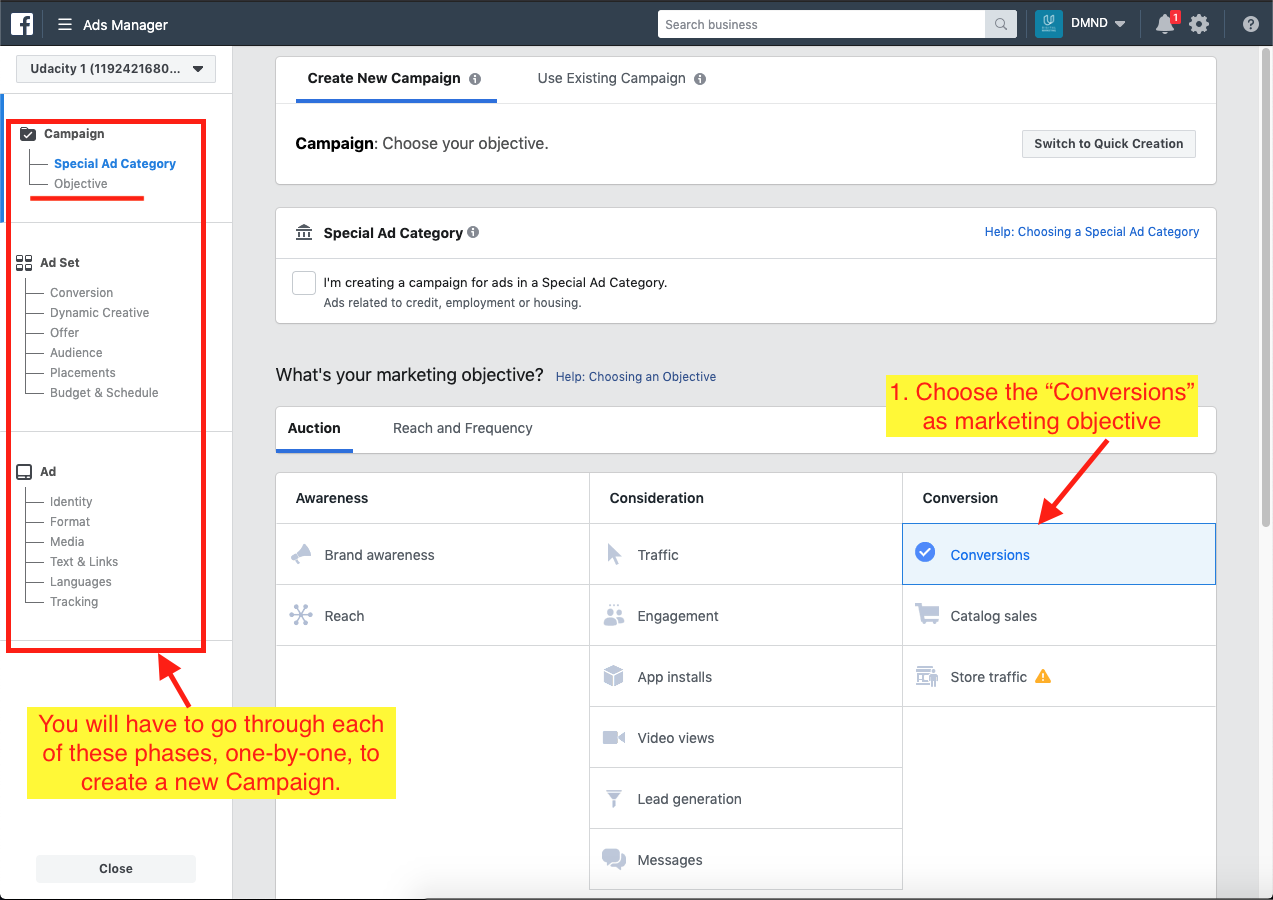
A single Campaign may contain multiple Ads. The steps to create a new Campaign are broadly divided into three phases, titled as - Campaign, Ad Set, and Ad. We will provide the necessary details in each phase, as shown below:
A. Phase - Campaign
Here, we provide the Campaign name, marketing objective, and budget optimization values.
A.1. Objective
- Marketing Objective: For this project your Campaign’s objective is “Conversions”. Click on “Conversions” under Conversion. For the Digital Marketing Nanodegree Program challenge, the conversion would lead to eBook Download. Similarly, for the Udacity Enterprise’s DMND Corporate Training challenge, the conversion would lead to generating bulk seat purchases by companies.
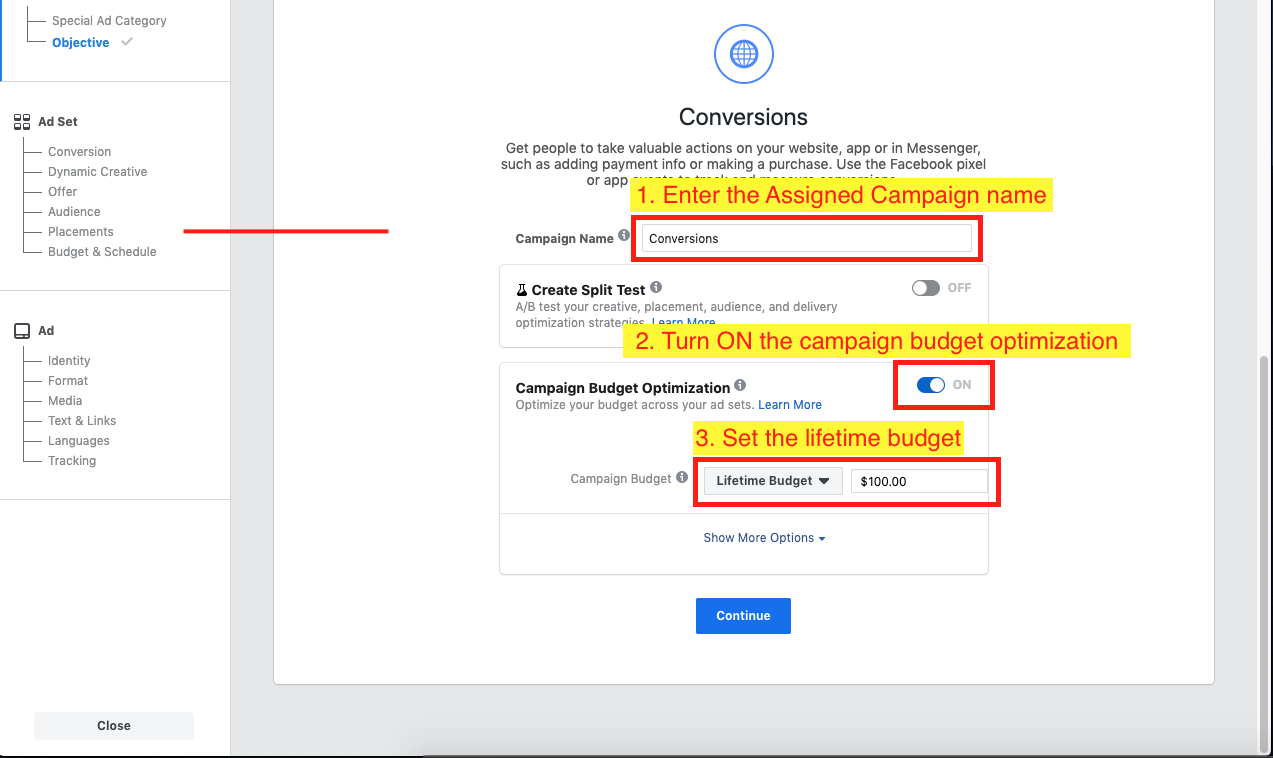
- Campaign Name: Update the “Campaign Name” with your Assigned Campaign name.
- Need help locating your assigned campaign name? After you have requested access to Facebook, you'll receive an email with your campaign name in addition to your Facebook invitation. If after a week you still are unable to locate the email, email us dmnd-support@udacity.com.
- Turn ON the Campaign Budget Optimization.
- Campaign Budget: Select “Lifetime Budget” from the dropdown menu. Set budget to $100.00.
B. Phase - Ad Set
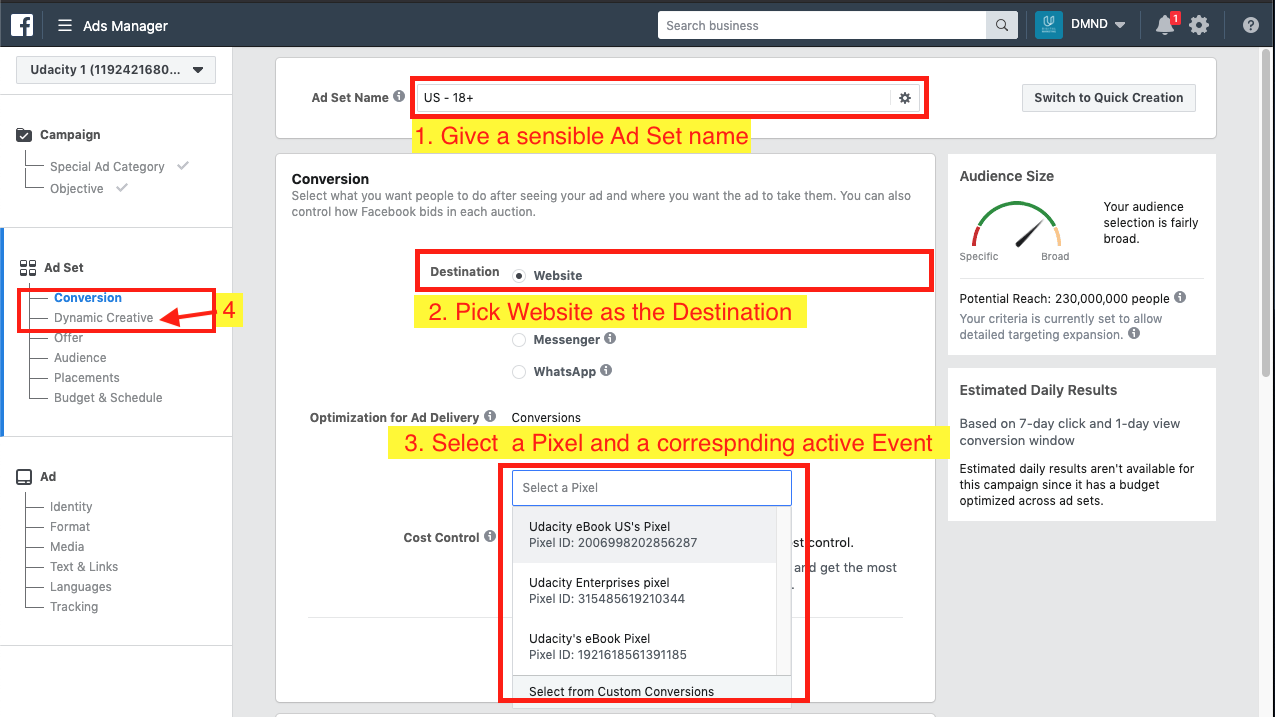
B.1. Conversion, and Dynamic Creative
- Ad Set Name: Use a name that describes your target audience.
- Destination: Pick the Website as the Destination
- Optimization for Ad Delivery: Select a Pixel and a corresponding active event. Select either Udacity’s eBook Pixel or Udacity’s Enterprise Pixel from the drop-down menu.
- It is optional to try and experiment enabling the Dynamic Creative.
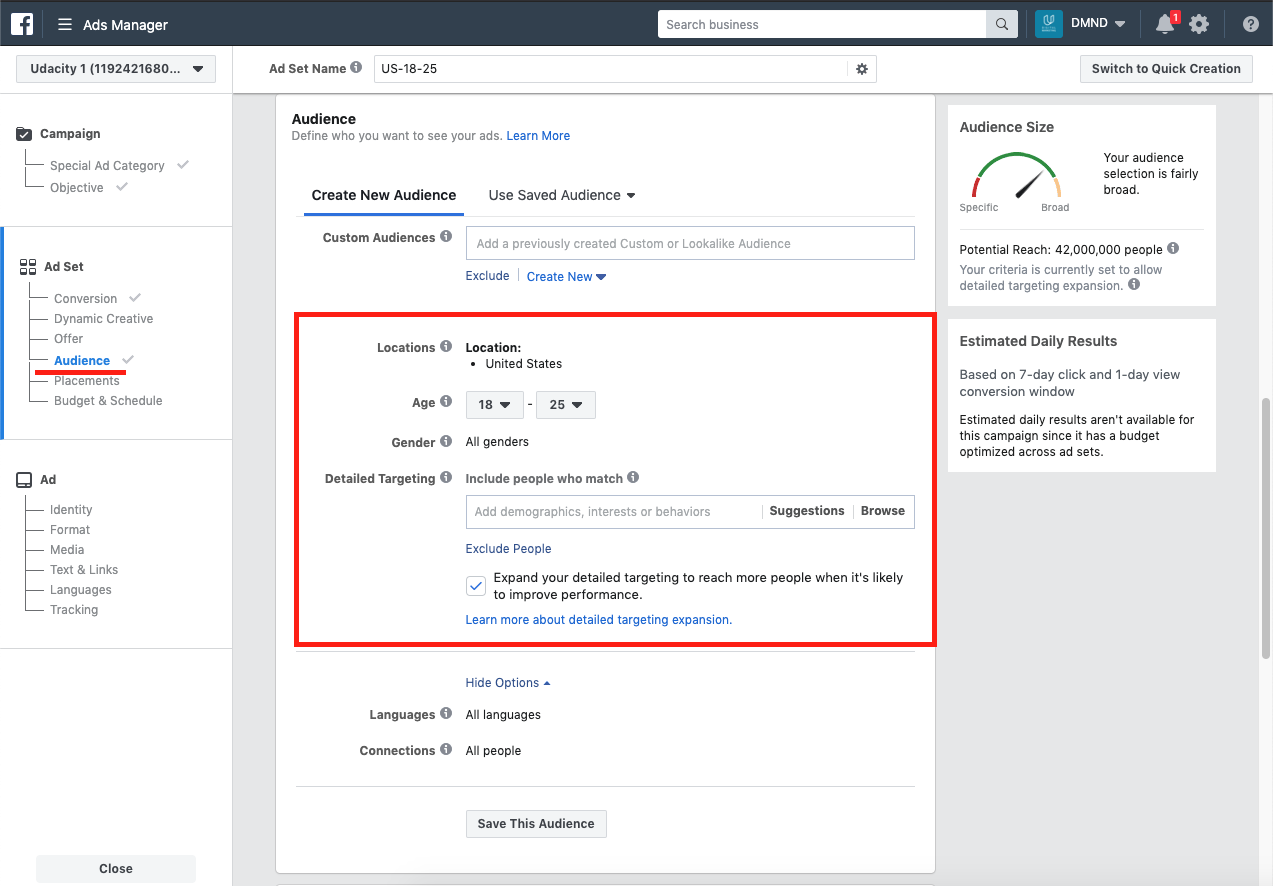
B.2. Audience
- Location: Keeping your Target Customer Persona, customize your ad targeting: location, age range, gender, and language. Keep in mind that the regulations around Facebook usage in China, it is not advisable to target China.
- Detailed Targeting: Refine your campaign with “Detailed Targeting”, this will “Include” people who match at least ONE of the following: demographics, interests and/or behaviors (here you can also “Exclude People” to do this click on the text in blue under the input field “Exclude People”)
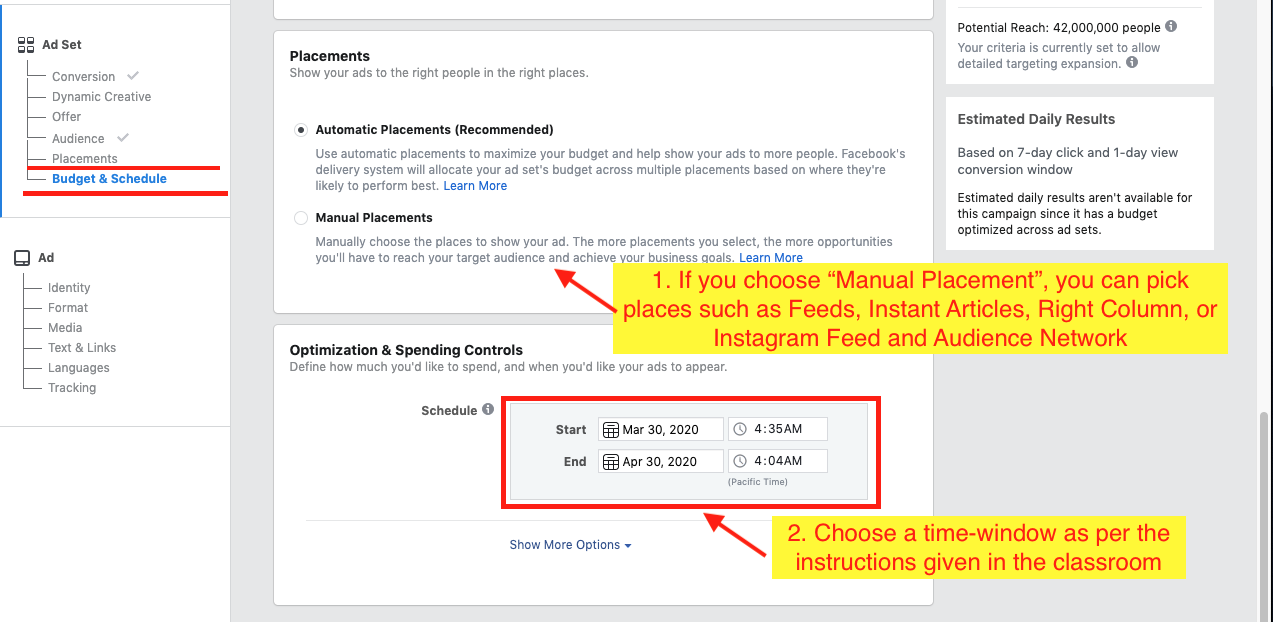
B.3. Placements, and Budget & Schedule
Placements define the the places where you want your ad to be shown. You are free to choose either Automatic or Manual placements. If you choose Manual Placements, you can pick places such as Feeds, Instant Articles, Right Column, or Instagram Feed and Audience Network.
Budget & Schedule helps adhere to the schedule and budget constraints.
- Schedule: ***Set the “Schedule” to “Start” a minimum of one week out from today's date. Set the “End” date for your campaign to three to five days after the start date. ***
C. Phase - Ad
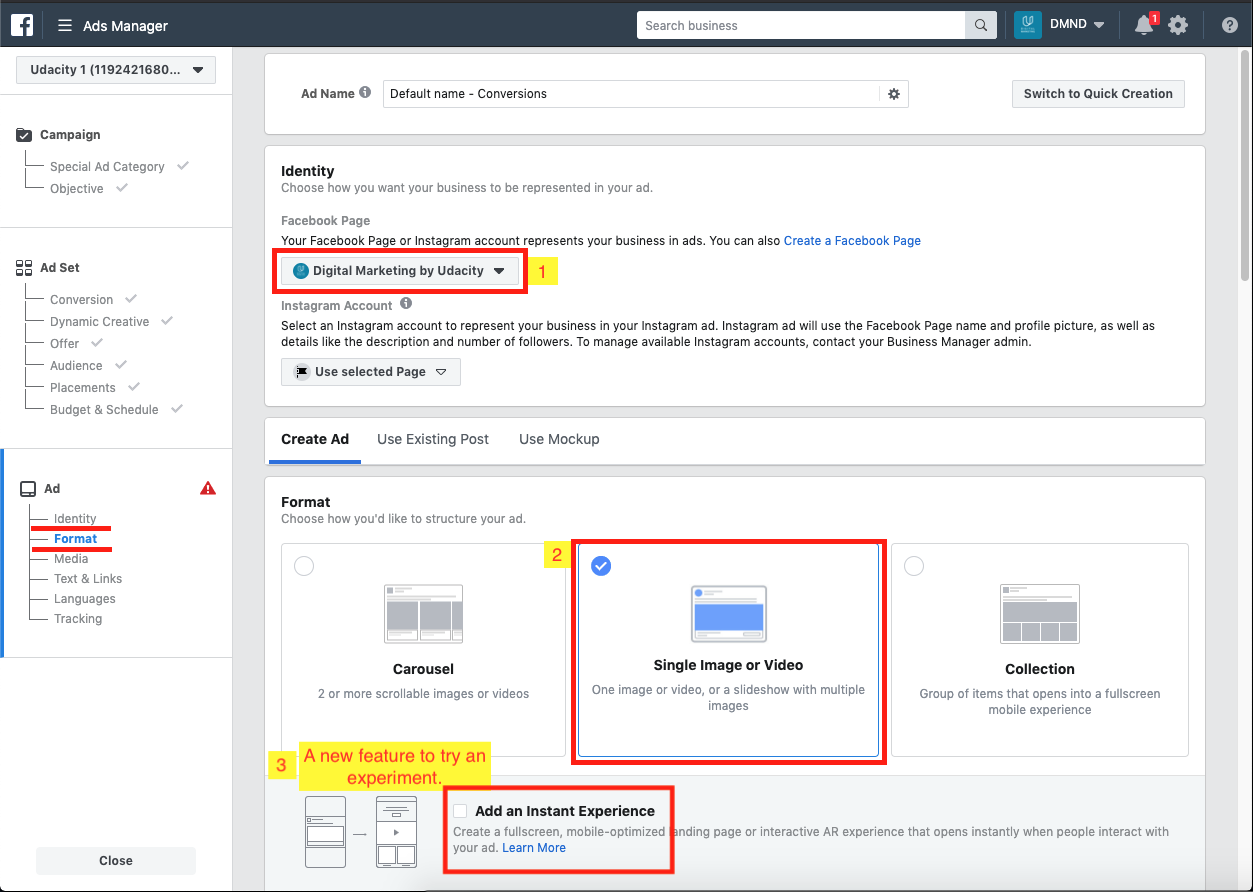
C.1. Identity, and Format
- Identity: The Destination page would be selected by default in the * Identity*.
- ** Facebook Page**: If not selected by default, select “Digital Marketing by Udacity” from the drop-down menu.
- Instagram Account: if you have Instagram as an option, select “udacitydmnd” from the drop-down menu
- Format: Let us create an ad Digital Marketing Nanodegree Program. Make sure you are in the Create Ad section. Select Single Image or Video.
- You can try a new feature Add an Instant Experience that creates a fullscreen, mobile-optimized landing page.
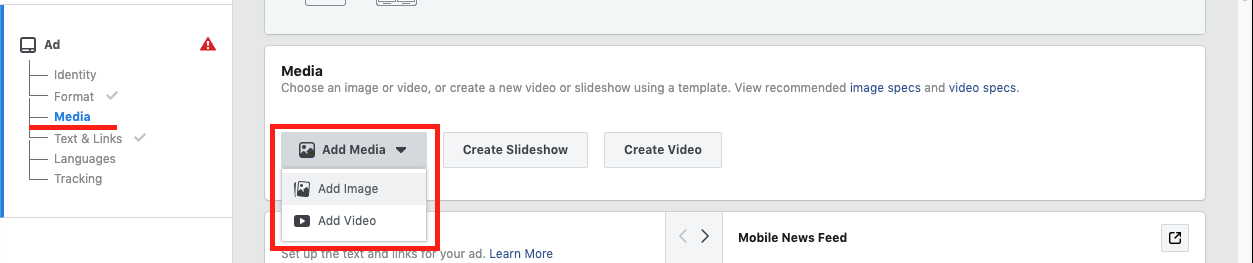
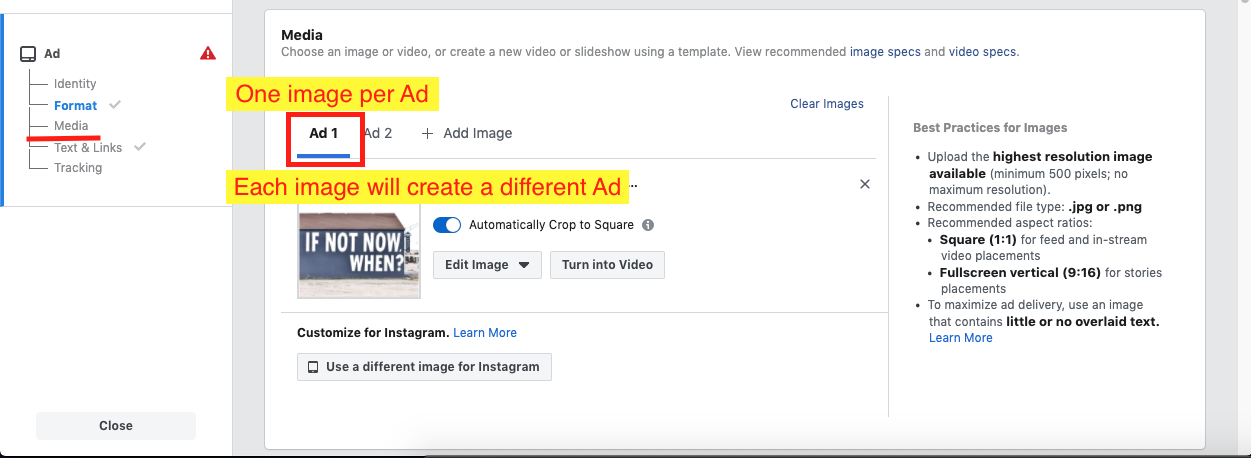
C.2. Media
- Click on the drop-down to add the desired image to create your ad. Choose your own images or Free Stock Images provided by Facebook. Make sure that your images have little or no text overlay as Facebook won't deliver these ads. Also, don't include any company logos in your ad creatives.
- ***You will be allowed to upload one image per ad. Each image will create a different ad. ***
C.3. Text & Links
- Enter the suitable text, such as headline, primary text, and description.
- Headlines will not appear in all ads, so the body of the ad should not be dependent on the Headline.
- The Body of the ad should have a clear message about the product you are marketing.
- Destination: Add the destination-website URL for the product you are marketing. DMND - http://dmnd.udacity.com/ebook or Enterprise - http://dmnd.udacity.com/corporate-training
- Call To Action: Select a call to action from the drop-down menu that speaks to the content of your ad keeping in mind that the landing page destination of the ad.
- Choose a preferable view, such as Mobile, desktop, from the View pane.
- See the Preview in the right pane. It helps to appeal to your target customer persona and clearly advertise either the eBook or Blitz Services.

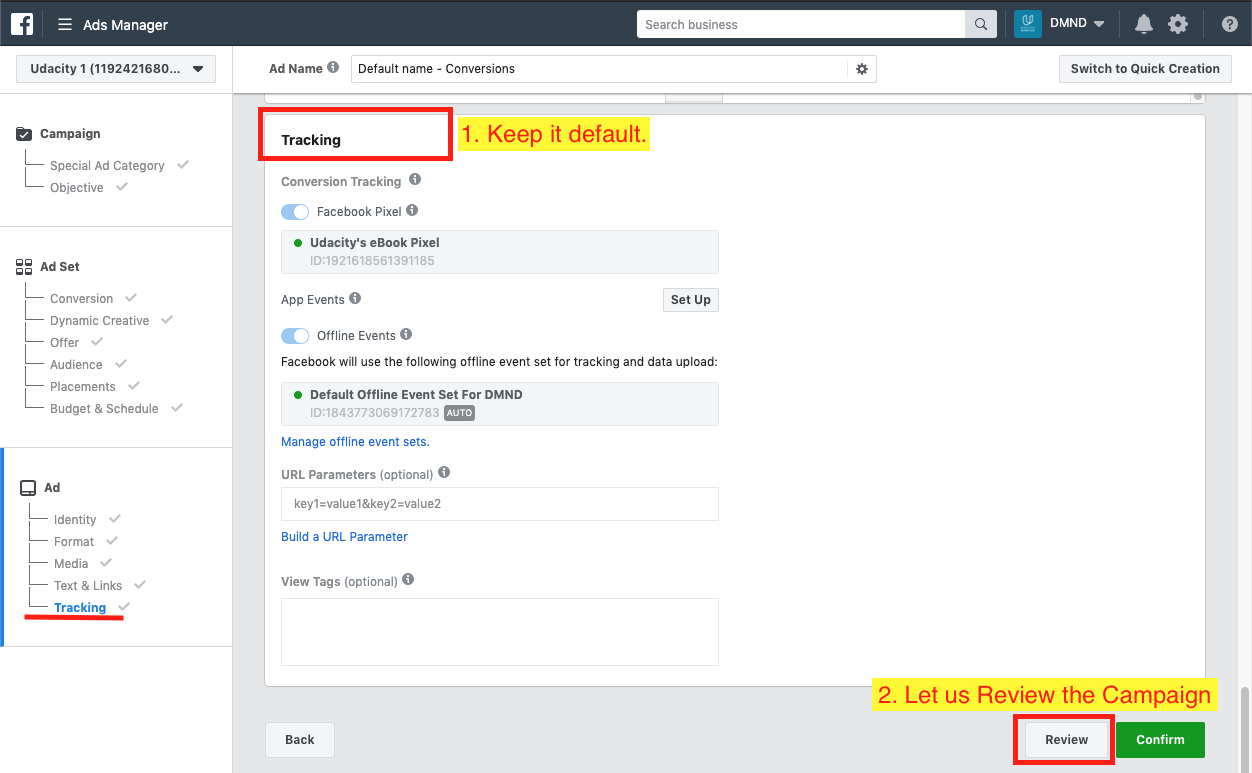
C.4. Tracking
- Keep the Tracking as default.
- Click on Review button to see the Campaign details.
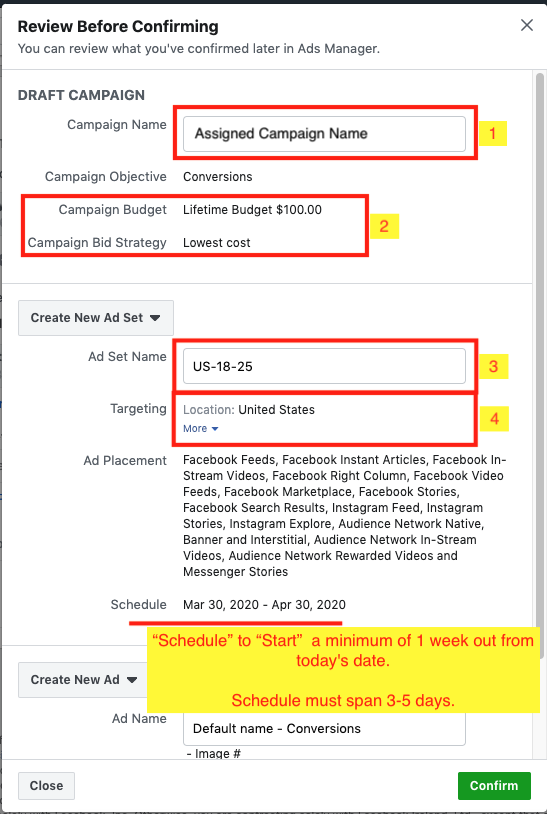
C.5. Campaign Review
To complete the first part of the project you will need to submit screenshots of your Review page. Before you take your screenshot, check and/or update the following:
- Campaign Name - Confirm that your campaign name is your Assigned Campaign name
- Campaign Budget - It should display $100.00 as Lifetime Budget.
- Ad Set Name - It should be a description of your target customer persona
- Targeting - It should present the location, placement, and schedule of your Campaign.